Integrate MetaMask into a DApp
With the release of MetaMask's Custom Networks API , users can be prompted to add Elysium Testnet, Elysium Mainnet.
This section will take you through the process of adding a "Connect to Elysium Mainnet" button that will prompt users to connect their MetaMask account(s) to Elysium Mainnet. Your users will no longer need to know or worry about Elysium Alpha's network configurations and adding a custom network to MetaMask. To interact with Elysium from your dApp, all users will need to do is click a few buttons to connect to Elysium Mainnet and get started.
MetaMask injects a global Ethereum API into websites users visit at window.ethereum, which allows the websites to read
and request the users' blockchain data. You'll be using the Ethereum provider to walk your users through the process of
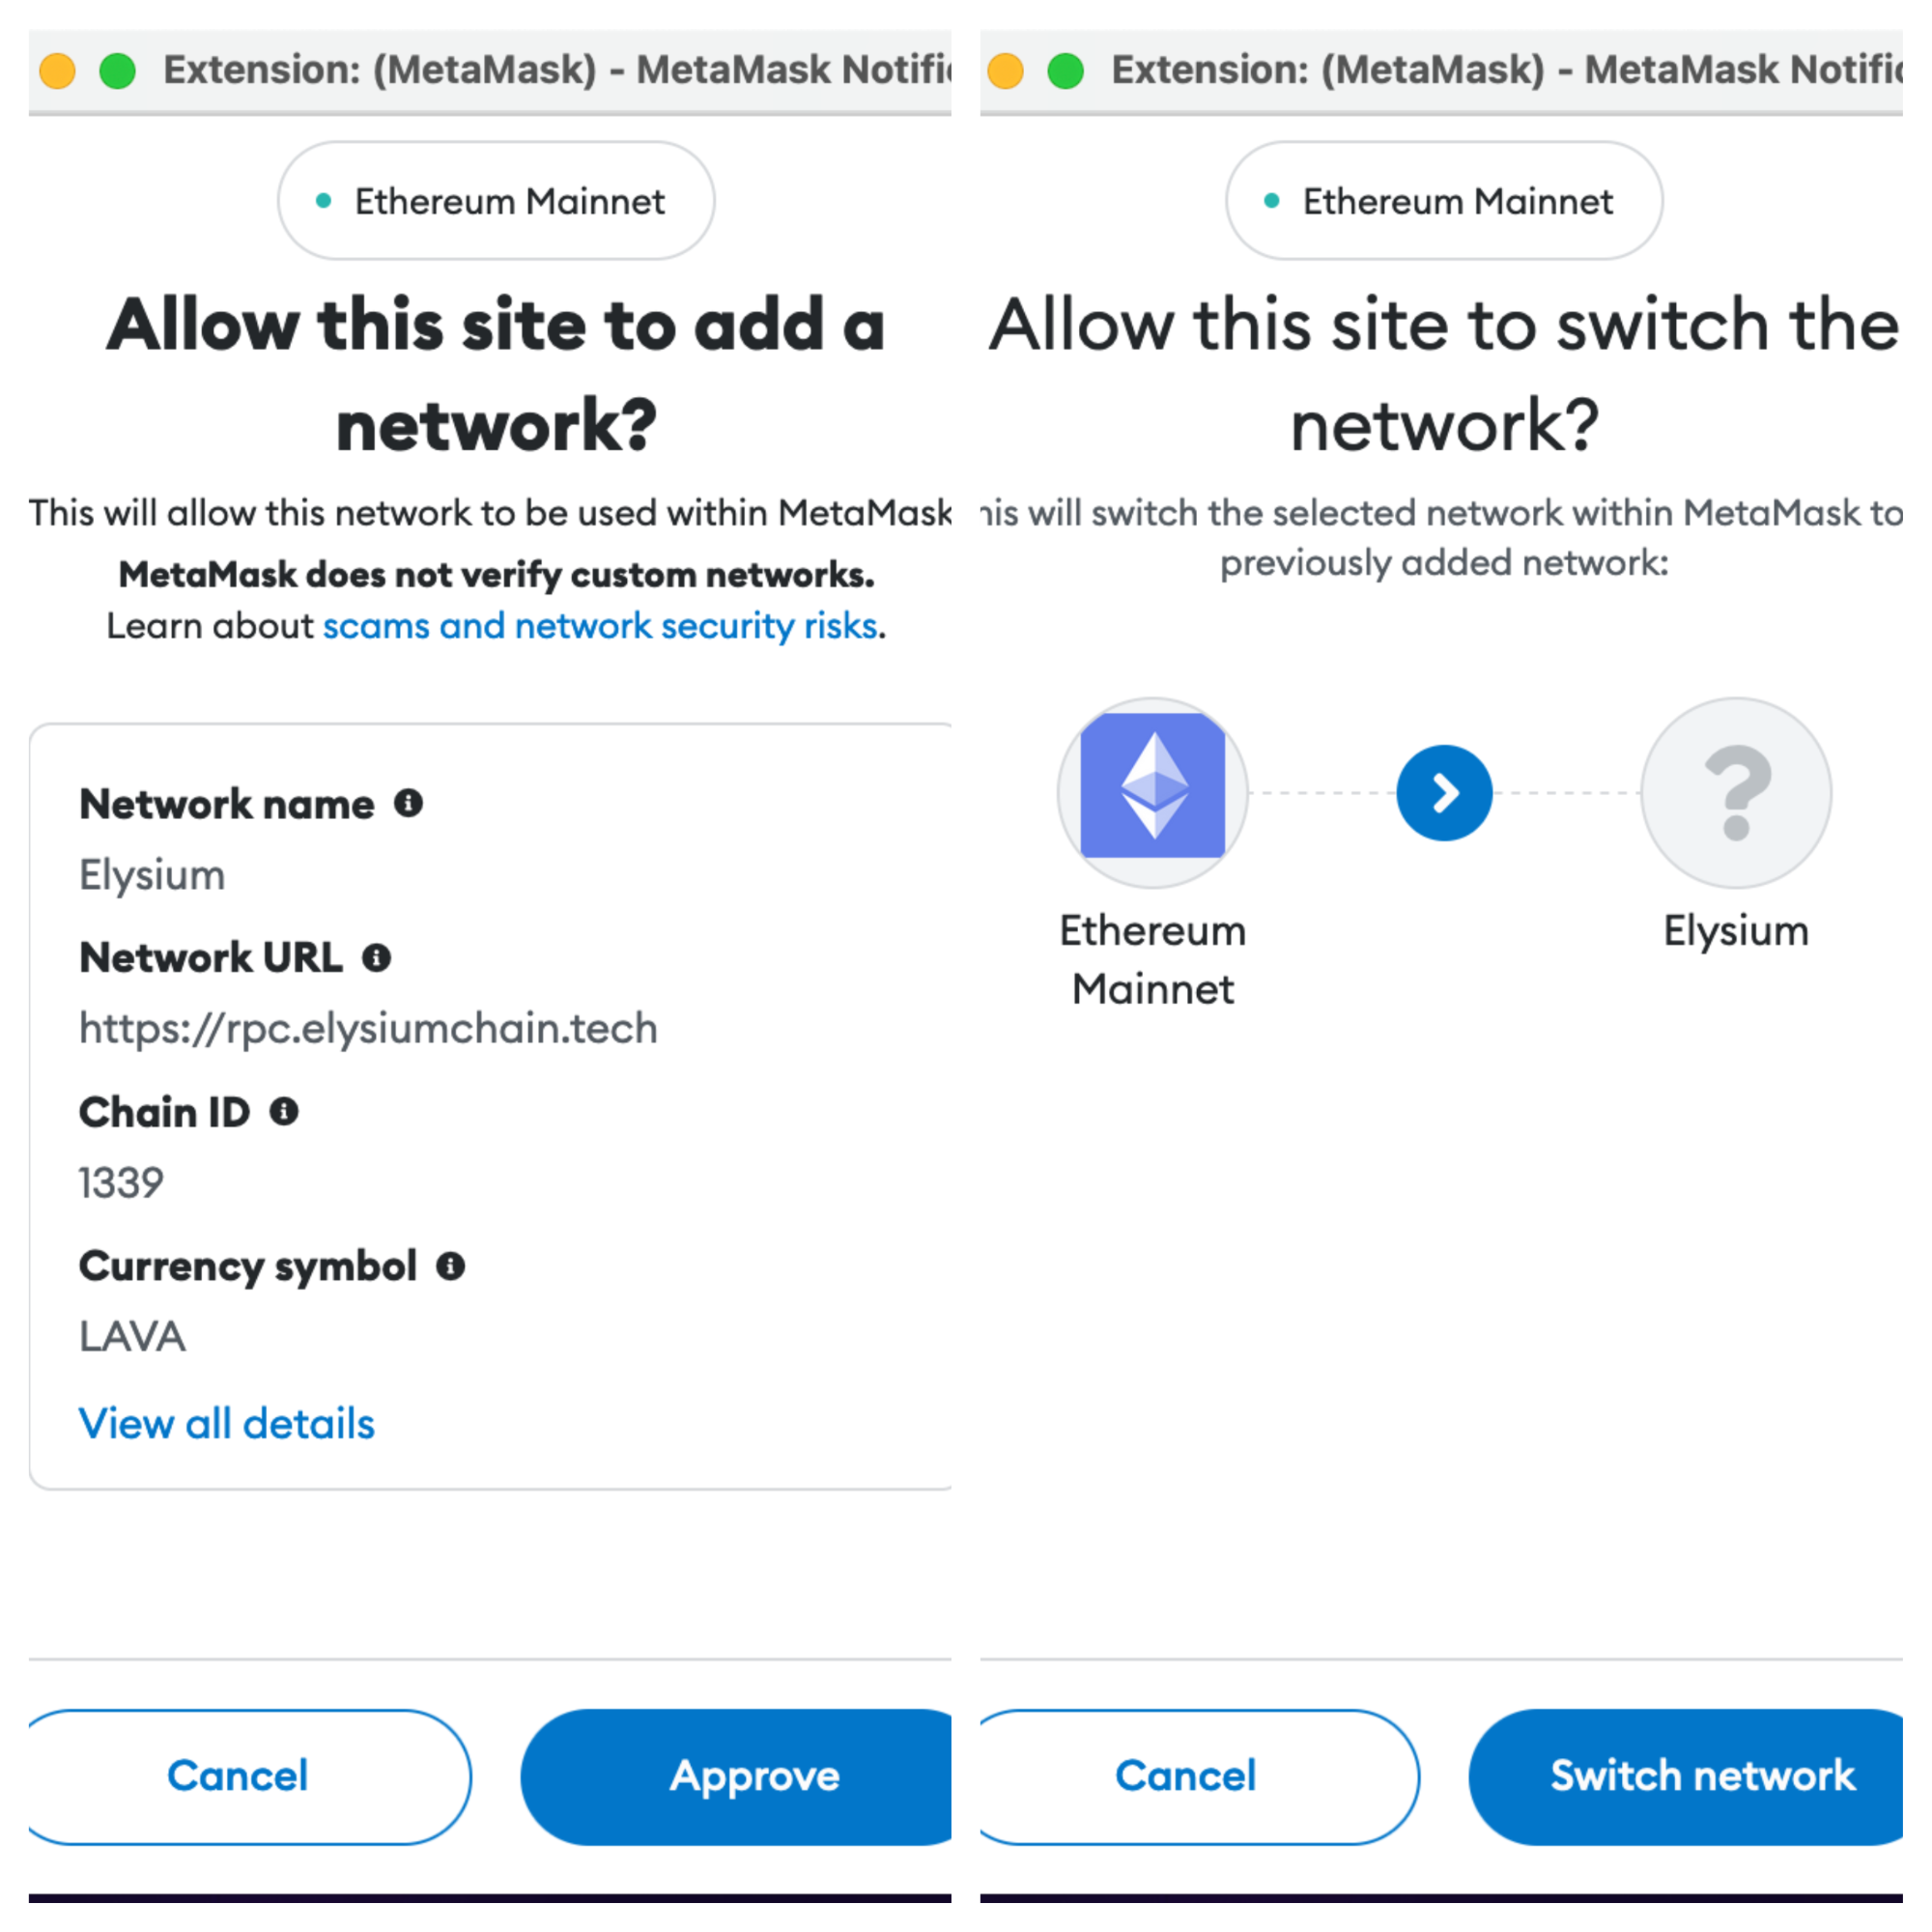
adding Elysium Mainnet as a custom network. In general, you will have to:
- Check if the Ethereum provider exists and if it's MetaMask
- Request the user's account address
- Add Elysium Mainnet as a new chain
This guide is divided into two sections. First, it'll cover adding a button that will be used to trigger MetaMask to pop-up and connect to Elysium Mainnet. The second part of the guide will create the logic for connecting the user to MetaMask. This way when you click the button you can actually test the functionality as you go through the guide.
Checking Prerequisites
To add the Connect MetaMask button you'll need a JavaScript project and the MetaMask browser extension installed for local testing.
It's recommended to use MetaMask's detect-provider utility package to detect the provider injected
at window.ethereum. The package handles detecting the provider for the MetaMask extension and MetaMask Mobile. To
install the package in your JavaScript project, run:
npm install @metamask/detect-provider
Add a Button
You'll start off by adding a button that will be used to connect MetaMask to Elysium Mainnet. You want to start with the button so when you create the logic in the next step you can test the code as you make your way through the guide.
The function you will create in the next section of the guide will be called configure Elysium. So the button on
click should call configure Elysium.
<button onClick={configureElysium()}>Connect to Elysium Mainnet</button>
Add Logic
Now that you have created the button, you need to add the configureElysium function that will be used on click.
-
Detect the provider at
window.ethereumand check if it's MetaMask. If you want a simple solution you can directly accesswindow.ethereum. Or you can use MetaMask'sdetect-providerpackage and it will detect the provider for MetaMask extension and MetaMask Mobile for youimport detectEthereumProvider from '@metamask/detect-provider';
const configureElysium = async () => {
const provider = await detectEthereumProvider({ mustBeMetaMask: true });
if (provider) {
// Logic will go here
} else {
console.error("Please install MetaMask");
}
} -
Request the user's accounts by calling the
eth_requestAccountsmethod. This will prompt MetaMask to pop-up and ask the user to select which accounts they would like to connect to. Behind the scenes, permissions are being checked by callingwallet_requestPermissions. Currently, the only permissions are foreth_accounts. So you're ultimately verifying that you have access to the user's addresses returned frometh_accounts. If you're interested in learning more about the permissions' system, check out EIP-2255import detectEthereumProvider from '@metamask/detect-provider';
const configureElysium = async () => {
const provider = await detectEthereumProvider({ mustBeMetaMask: true });
if (provider) {
try {
await provider.request({ method: "eth_requestAccounts"});
} catch(e) {
console.error(e);
}
} else {
console.error("Please install MetaMask");
}
}
-
Add Elysium Mainnet as a new chain by calling
wallet_addEthereumChain. This will prompt the user to provide permission to add Elysium Mainnet as a custom network. Once the network has been successfully added, it will also prompt the user to then switch to Elysium Mainnetimport detectEthereumProvider from '@metamask/detect-provider';
const configureElysium = async () => {
const provider = await detectEthereumProvider({ mustBeMetaMask: true });
if (provider) {
try {
await provider.request({ method: "eth_requestAccounts"});
await provider.request({
method: "wallet_addEthereumChain",
params: [
{
chainId: "{{ networks.Elysium .hex_chain_id }}", // Elysium Mainnet's chainId is {{ networks.Elysium .chain_id }}, which is {{ networks.Elysium .hex_chain_id }} in hex
chainName: "Elysium Mainnet",
nativeCurrency: {
name: 'DEV',
symbol: 'DEV',
decimals: 18
},
rpcUrls: ["{{ networks.Elysium .rpc_url }}"],
blockExplorerUrls: ["{{ networks.Elysium .block_explorer }}"]
},
]
})
} catch(e) {
console.error(e);
}
} else {
console.error("Please install MetaMask");
}
}
So, now you should have a button that, on click, walks users through the entire process of connecting their MetaMask accounts to Elysium Mainnet.
Confirm Connection
It's possible that you'll have logic that relies on knowing whether a user is connected to Elysium Mainnet or not.
Perhaps you want to disable the button if the user is already connected. To confirm a user is connected to Elysium
Alpha, you can call eth_chainId, which will return the users current chain ID:
    const chainId = await provider.request({
    method: 'eth_chainId'
})
// Elysium Mainnet's chainId is {{ networks.Elysium .chain_id }}, which is {{ networks.Elysium .hex_chain_id }} in hex
if (chainId === "{{ networks.Elysium .hex_chain_id }}") {
    // At this point, you might want to disable the "Connect" button
    // or inform the user that they are already connected to the
    // Elysium Mainnet testnet
}
Listen to Account Changes
To ensure that your project or dApp is staying up to date with the latest account information, you can add
the accountsChanged event listener that MetaMask provides. MetaMask emits this event when the return value
of eth_accounts changes. If an address is returned, it is your user's most recent account that provided access
permissions. If no address is returned, that means the user has not provided any accounts with access permissions.
    provider.on("accountsChanged", (accounts) => {
    if (accounts.length === 0) {
        // MetaMask is locked or the user doesn't have any connected accounts
        console.log('Please connect to MetaMask.');
    }
})
Listen to Chain Changes
To keep your project or dApp up to date with any changes to the connected chain, you'll want to subscribe to
the chainChanged event. MetaMask emits this event every time the connected chain changes.
    provider.on("chainChanged", () => {
    // MetaMask recommends reloading the page unless you have good reason not to
    window.location.reload();
})
MetaMask recommends reloading the page whenever the chain changes, unless there is a good reason not to, as it's important to always be in sync with chain changes.